

Replacing a shower head is one of the easier plumbing upgrades a homeowner can make, but it still goes wrong all the time. The most common mistakes are cross-threading the new head, overtightening the connection, cracking the finish on the shower arm, or creating a slow leak inside the wall because the arm gets twisted loose.
If you take your time and use the right sequence, the job is usually simple and clean.
Why homeowners replace shower heads
There are several good reasons to swap out an old shower head:
- Mineral buildup is affecting spray performance
- The existing head leaks or drips after use
- You want a more efficient model
- You want stronger spray settings or a handheld option
- The finish is worn out or no longer matches the bathroom
In homes with harder water, buildup around nozzles and internal passages is one of the most common reasons performance drops over time.
Tools and materials
For most replacements, you only need a short list:
- Adjustable pliers or a small wrench
- Soft cloth or rag
- PTFE thread tape
- The new shower head
- Optional white vinegar if you want to clean the arm before reinstalling
If the existing shower head is badly seized, you may also need penetrating oil and a little patience.
Step 1: protect the finish before turning anything
Wrap a cloth around the old shower head or around the flats on the connection point before using pliers. This helps prevent scratches on chrome, brushed nickel, or black finishes.
Do not grab the shower arm out near the wall and force it without support. That can rotate the arm inside the elbow in the wall, which creates a larger repair than a simple shower-head swap.
Step 2: remove the old shower head carefully
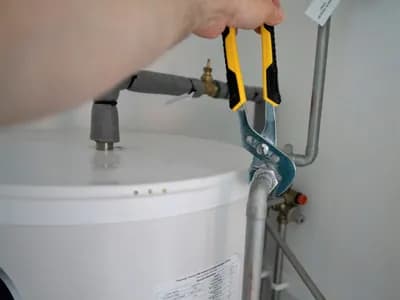
Hold the shower arm steady with one hand if possible. Then turn the old shower head counterclockwise to remove it.
If it does not move:
- Apply gentle pressure first
- Reposition your grip so you are turning the shower head, not bending the arm
- Use a small amount of penetrating oil if mineral buildup is locking the threads
Avoid sudden hard force. A broken shower arm at the wall can turn a small bathroom update into a behind-the-wall repair.
Step 3: inspect and clean the threads
Once the old head is off, inspect the shower arm threads.
Look for:
- Old thread tape still wrapped around the threads
- Mineral scale
- Damaged or flattened threads
- Cracks in the arm finish or metal
Remove old tape completely before installing the new head. If buildup is present, wipe the threads clean. If the threads are damaged, the new head may never seal correctly, and it may be smarter to replace the arm as well.
Step 4: apply thread tape the right way
Wrap PTFE tape clockwise as you face the threaded end of the shower arm. Two or three neat wraps are usually enough.
Clockwise matters because the tape needs to stay in place as the new head is threaded on. If you wrap the tape the wrong direction, it will bunch up instead of sealing.
Step 5: install the new shower head by hand first
Thread the new shower head on by hand before using any tool.
This is how you avoid cross-threading. If it does not turn smoothly in the first few rotations, stop and back it off. Do not force it.
Once it is hand-tight, use a cloth and pliers only if the manufacturer recommends a slightly tighter finish. Many modern shower heads do not need much extra tightening at all.
Step 6: test for leaks
Turn the shower on and watch the connection where the head meets the arm.
If you see a drip:
- Turn the shower off
- Remove the head
- Rewrap the threads
- Reinstall and test again
A few drops from the face of the shower head right after shutoff can be normal. Water leaking from the threaded connection is not.
When a simple replacement is not really simple
Call a plumber if:
- The shower arm moves at the wall when you try to remove the old head
- The old shower head is seized and will not break loose
- The threads are damaged
- You want to convert to a handheld assembly with additional mounting or supply components
- You see leaking behind the wall or around the escutcheon
Those situations usually mean the issue is no longer just the shower head.
A note on water pressure expectations
A new shower head can improve spray quality, but it will not solve every pressure problem. If the whole bathroom has weak flow, or if pressure is poor throughout the house, the issue may be elsewhere in the plumbing system.
Final takeaway
Replacing a shower head is a good DIY project when the shower arm, threads, and wall connection are in good shape. The safest approach is simple: protect the finish, support the arm, hand-thread the new head first, and test the connection carefully.
If you want help with a leaking shower arm, damaged threads, or a larger bathroom plumbing upgrade in Sevierville, Gatlinburg, or Pigeon Forge, Plumber in a Box can handle it cleanly and correctly.